Home > Using PhotoTools 25 > Using the Masking Tools > Using the MaskingBug > Adjusting the MaskingBug
Adjusting the MaskingBug
Adjusting the Size, Shape and Position
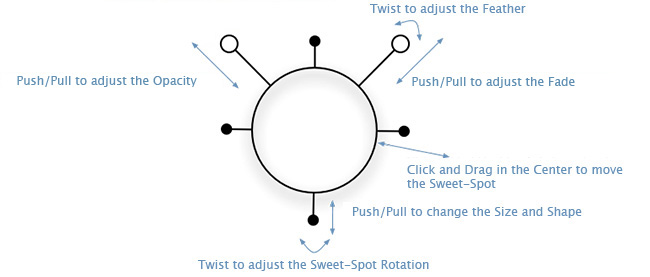
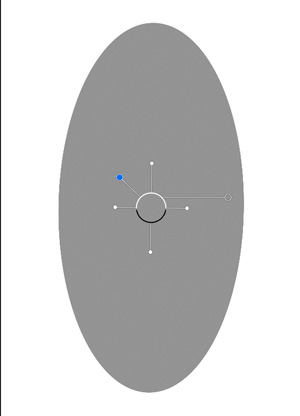
The MaskingBug controls the position, size and shape of the sweet-spot. To position the MaskingBug make sure you have it selected from the toolbar and that you have the correct Effect selected in the Stack. Then click, hold and drag inside the body of the bug. Place the MaskingBug in the middle of the area you want to mask.
To control the size and shape of the sweet-spot you will need to manipulate the legs of the MaskingBug. The legs are the shorter appendages that extend out of the MaskingBug body. On the round MaskingBug there will be four legs. On the planar MaskingBug there will be only two legs. To adjust a leg click, hold and drag it with your mouse. You will know when you can select a leg by the end of it glowing blue when your mouse pointer approaches it. The length of the legs control the size and shape of the sweet-spot. You can also rotate the legs around the body to change the angle of rotation of the sweet-spot.
 |
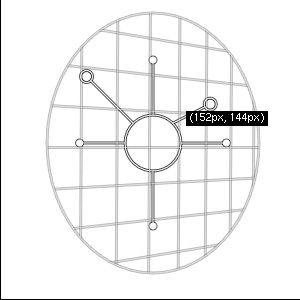
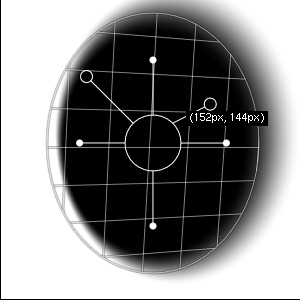
Tip: It is often useful to turn on the grid when adjusting the MaskingBug. This will allow you to see the exact size, shape and position of the sweet-spot. You can turn on the grid by going to View > MaskingBug Grid and selecting Auto or On. The grid is set to Auto by default, meaning it will only appear when you are adjusting the MaskingBug. |
Using the Antennae
The antennae of the MaskingBug control the Fade amount as well as the opacity and feather of the mask. You adjust the antennae the same as the legs. Click, hold and drag the antenna you wish to adjust.
The right antenna controls Fade amount and featherr. The length of the antenna controls the Fade amount. The longer the antenna the stronger the effect will be. The angle of the antenna in relation to the body controls the feather or the transition between the sweet-spot and the rest of the image.
You can lock the antenna so you only adjust one of its variables at a time.
The length of the left antenna controls the opacity of the mask.
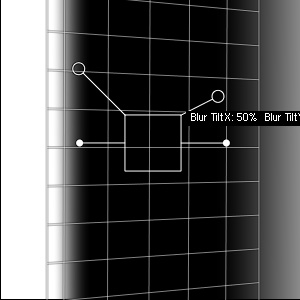
Adjusting the 3-D Tilt
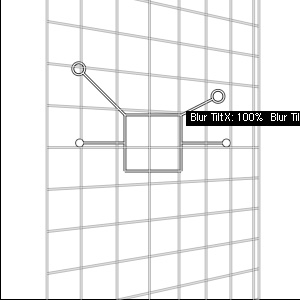
You can also use the MaskingBug to tilt the plane of the mask. This will vary the gradation on each side of the sweet-spot. To control the tilt click and hold the option (Mac) alt (Windows) key and then click and drag inside inside the body of the MaskingBug. You will notice the grid will appear and as you move your cursor inside the MaskingBug’s body the grid will tilt in three dimensions. You can reset the tilt by holding option (Mac) alt (windows and double-clicking inside the MaskingBug’s body.
| Round MaskingBug tilted to the right |
Round MaskingBug tilted to the right with mask visible |
 |
 |
| Planar MaskingBug tilted to the right | Planar MaskingBug tilted to the right with mask visible |
 |
 |
Adjusting the MaskingBug Feather
| Small feather, hard edge |
High feather, soft edge |
 |
 |
Adjusting the MaskingBug Opacity
The opacity controls the opacity of the sweet-spot. At a setting of 100%, the sweet-spot is completely protected from or completely applying the effect. As the opacity is decreased, the sweet-spot begins to soften. In most cases you will want the opacity to remain at 100%. The opacity is also controlled with the left antenna.
| 100% Opacity |
50% Opacity |
| |
 |
See also