Home > Using PhotoTune > Using Pro Mode > Using Snapshots
Using Snapshots 
The Snapshot button (camera) , is located in the toolbar under the preview images. You can record up to four Snapshots in addition to the Wizard Snapshot. After that, you will be prompted to replace a Snapshot whenever you make a new Snapshot.
When a Snapshot is selected from the right-hand pop-up menu, the sliders are updated to reflect the adjustments saved with the Snapshot. Only the right-hand preview can be edited. Displaying Snapshots in the left-hand preview are for display purposes only.
| Managing Snapshots Every time you make a Snapshot, it is listed in both pop-up menus located under the preview images. You can use the pop-up menus to display any combination of Snapshots you’d like. Only the preview image on the right can be edited and altered with the sliders. Whenever a Snapshot is displayed on the right, the sliders are updated to show the recorded adjustments that were saved with the Snapshot. You could load Snapshots on both the left and right, so you can compare two images side-by-side while you make changes. If you make changes to a Snapshot, and then switch to a different Snapshot, PhotoTune will ask if you want to save the changes before you switch. If you want to make a new Snapshot, and you’ve used up your allotment of 4 Snapshots, PhotoTune will ask you which of the current Snapshots you want to replace. | 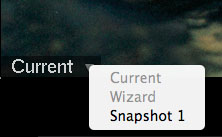 |
Typical Workflow
Like everything in PhotoTune, Snapshot is designed to speed up the correction process. Snapshot is a safety net that lets you continue experiment with different combinations without losing your previous edits. Take a Snapshot whenever you want to preserve a set of correction parameters so you can continue experimenting with impunity. Here’s a typical workflow using Snapshot:
- If you use the Wizard, a Snapshot is automatically taken (Wizard Snapshot).
- Fine-Tune the results obtained by the Wizard.
- Take a Snapshot to record your adjustments.
- Then experiment some more, and make another Snapshot.
- Use the pop-up menus to compare different Snapshots.
- Save History if you want to reuse your changes on a future image, or click Apply to process the changes shown in the right-hand preview.
See also