Home > Quick Start Guide > Wizard
Using the Wizard in PhotoTune 3
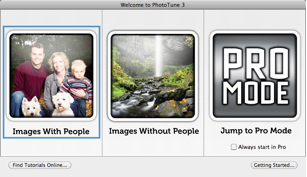
After opening an image and launching PhotoTune you'll see the Wizard interface (you can switch to Pro at anytime by clicking the Go Pro button). We’ll start with a portrait image. With the image open, click on the Images With People option.
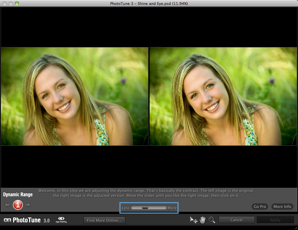
Step 1: The first step is to adjust the dynamic range. Drag the slider to the left or right until the image has the dynamic range you want. Click on the right image preview.
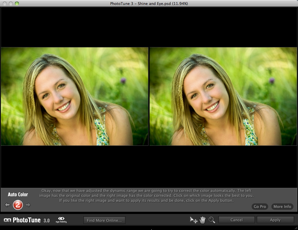
Step 2: The next step is Auto Color. In this step, PhotoTune 3 evaluates the image to determine the most accurate color and removes any obvious color casts. Simply click on the right preview to select the image with the auto color applied. If you prefer the left image, select it and you can then adjust the color in a guided process after the next step.
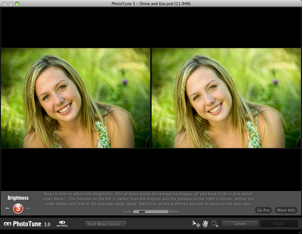
Step 3: Brightness adjustment is next. As you adjust the slider, both previews change – higher values will brighten the right side preview and darken the left side. Move the slider until you have the look you want, and then click on the left or right preview to select the version you like best.
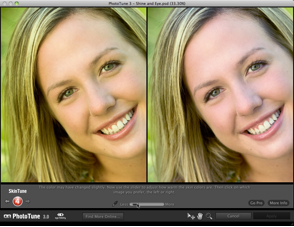
Step 4: SkinTune. SkinTune works by selecting a mid-tone to adjust the warmth of the skin. In this step, you use an eye dropper tool to select the area of skin that represents a middle tone. You don’t want to select a highlight or shadow area, as this will adjust the skin tones more than needed.
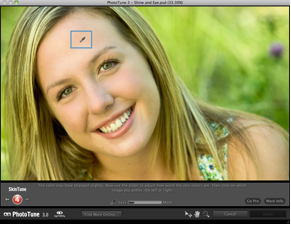
Once you’ve selected the mid-tone, you’ll see a split screen. You can use the slider to fine-tune the warmth of the skin tones. Click on the image that best represents the tone you want.
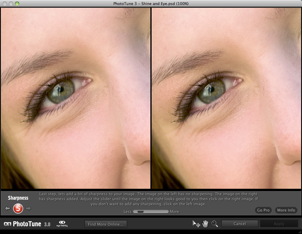
Step 5: Sharpen. Like the other steps, simply adjust the slider until the image has the desired amount of sharpness.
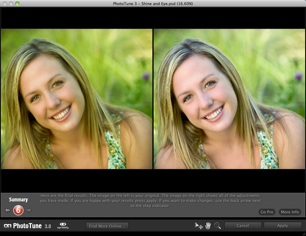
Once you’ve finished selecting the sharpness, PhotoTune 3 displays a before and after Summary screen. If you’re happy with the results, click Apply and PhotoTune 3 will apply the adjustments and return to your image editing application. If you want to make further adjustments, you can click on the back arrows to go to any step in the Wizard.
Landscapes
Using the Wizard with landscape type images (Images Without People) is nearly identical. The SkinTune step is removed, but all other steps are the same.
See also