Home > Using PhotoTune > Using Pro Mode > Adjusting Color
Adjusting Color
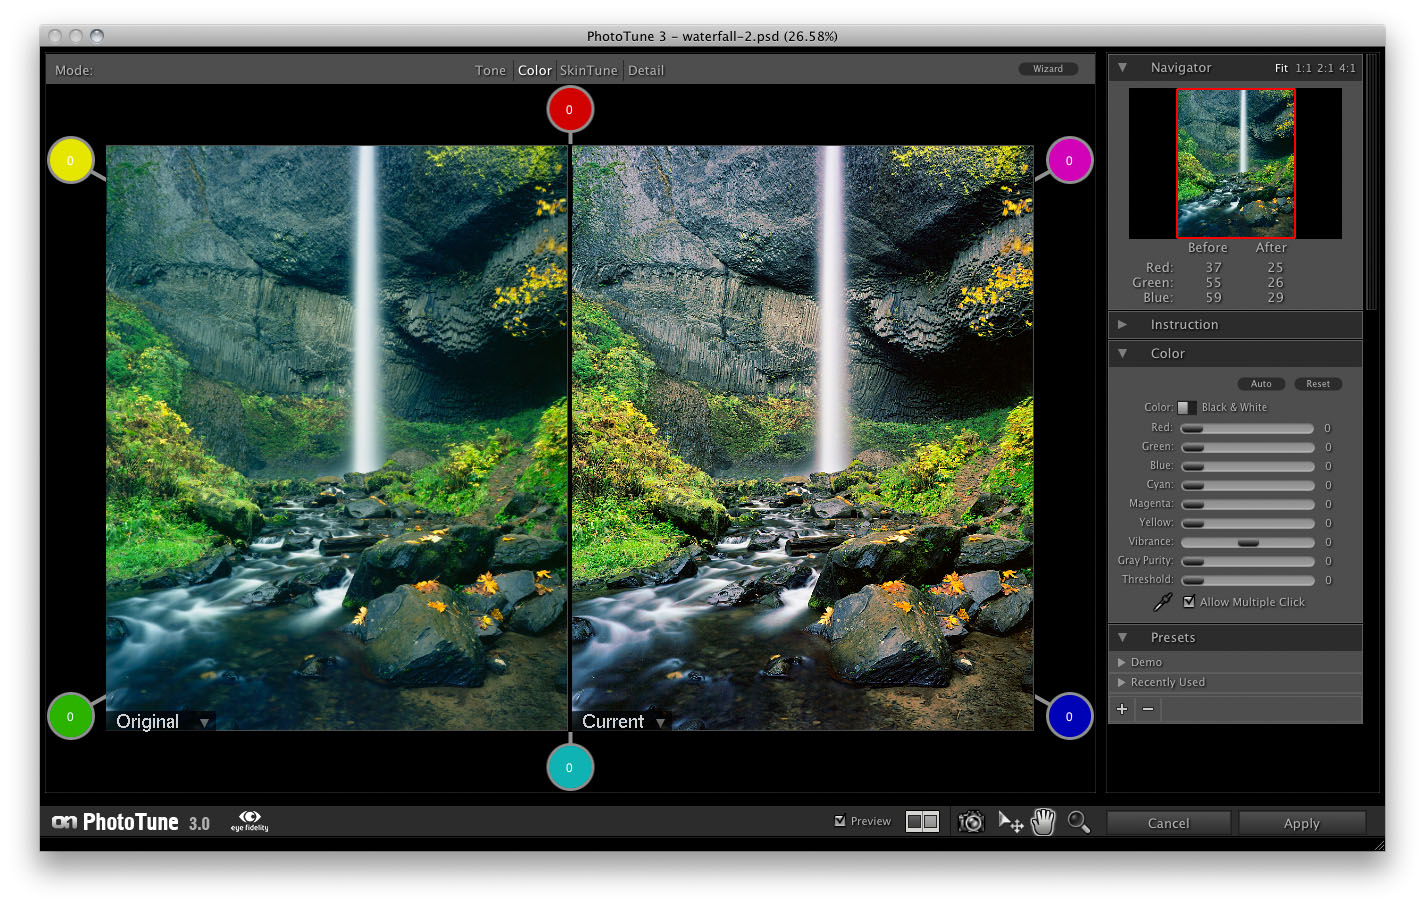
| The beauty of color correcting inside of the color wheel is it prevents you from creating unrealistic color adjustments buy affecting more than adjacent colors. In real life, a color cast will only be in a singe direction in the color wheel. In the example image above, the color cast is primarily cyan but may have a green or blue influence as well. It can not have a cyan - magenta or cyan - yellow cast as no such cast could exist, they would be a blue or green cast instead. This prevents you from making unrealistic or incorrect adjustments that are possible in other color correction tools. | 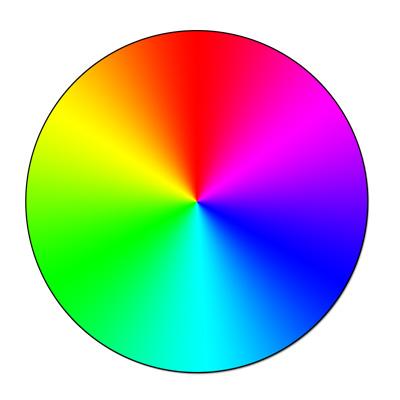 |
The remaining controls are located in the Color pane. It contains the following controls:
- Auto Cast Removal Toggle: This toggles the automatic removal of a color cast. In many cases the auto cast removal may be the only adjustment needed in the color pane. However on some images you may want to manually make further adjustments.
- Color or Black and White Toggle: PhotoTune can also create great looking black and white versions of image. Simply flip the toggle to black and white. You can then move the image around the preview space to alter the tone via color, just like using a colored filter over your lens on your camera. For portrait images, try moving the image in the green direction. For landscape images try a warm color from red to yellow.
- Color Sliders: The color sliders represent the six cardinal colors that you also see in the preview area. Even though all six color sliders are visible, only two may be used at any time. This is designed to prevent incorrect color correction technique. Generally moving the preview image inside the color wheel is the best way to adjust the color. You can use the arrow keys on your keyboard for small adjustments or the sliders to fine tune your settings.
- Vibrance: Vibrance controls how strong, or saturated your colors are. Think of this like the Color control on your television. The vibrance slider starts in the middle and can increase or decrease the color in your image.
- Gray Purity: Gray purity is actually made up of two controls the Gray Purity slider and the Threshold slider. This tool allows you to remove subtle color casts from near gray areas. This is great for shadows that may have a cross-color contamination or for wedding dresses. To use it, start by setting the gray purity to about 50%, then adjust the threshold up until the cast is reduced. Then adjust the amount of reduction with the Gray purity slider.
- Neutral Color Dropper: The neutral dropper is used by clicking on areas of the image that should be neutral gray. The really unique about the neutral dropper is that you can click on multiple areas of your image and it will average them to create a compound color correction. For example if your image has an overall cool cast but the shadows have a stronger cast than the rest of the image you could click in the midtones, then the shadows and it will color correct the different tonal ranges at the same time.
See also