Home > Getting Started > Getting Around the Interface > Library Interface
Library Interface
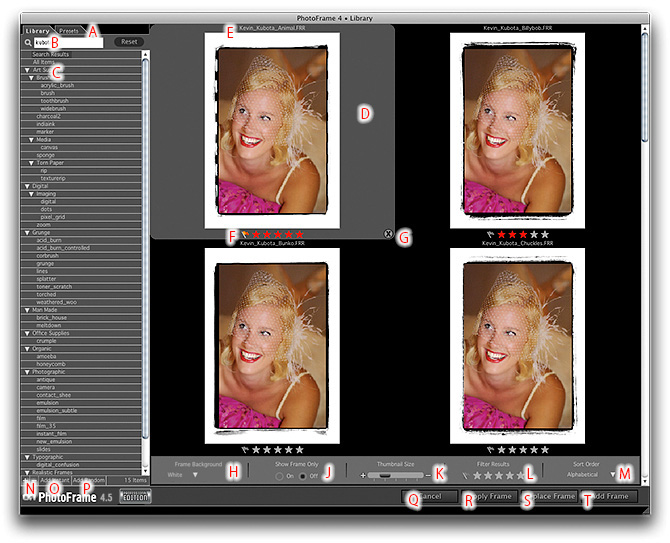
A - Library and Presets tabs: Select which tab you would like to view.
B - Search field: Type in keywords for elements you would like to find.
C - Category List: Heirarchical tree view of content categories.
D - Thumbnail (selected)
E - Element Name
F - Element Rating and Favorite: Click on the stars or flag to change the items rating or to make it a favorite
G - Remove from Results button: Removes the item from the current results set.
H - Background Color Selector: Toggles the element background color from white to black.
J - View Frame Only: Toggles between preivewing with our image or just the frame alone.
K - Thumbnail Size Slider: Changes the size of the thumbnails.
L - Filter Results: Allows you to only show elements in your results that are favorites or a certain star rating.
M - Sort Order: Changes the sort order of the results.
N - Add/Remove Element: Plus and minus buttons to add or remove frames from the library.
O - Add Instant: Adds an instant frame to the Frame Stack.
P - Add Random: Replaces any elements in the Frame Stack and adds a random selection of elements.
Q - Close Button: Closes the Library window.
R - Apply Frame Button: Adds the selected element and then applies the Frame Stack and returns to Photoshop.
S - Replace Frame Button: Replaces the current element in the Frame Stack with the selected element.
T - Add Frame Button: Adds the selected element to the Frame Stack.
 |
Tip: If you work with a large display or multiple displays you can set the Library to stay open, rather than closing automatically when you add a frame. Just resize the library to take up less than the full window or drag it to your second display. Then go the preferences and enable the "Keep Library Open" option. |
See also