Home > Using PhotoFrame > Color Picker
Color Picker
Color can be applied to the following frame effects/palettes:
To preview colors interactively using the Color pop-up:
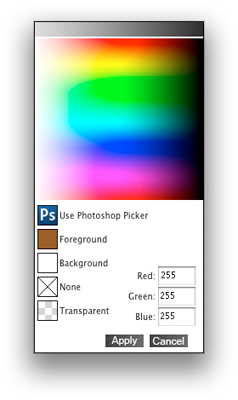
The color picker also shows the current Foreground and Background colors in Photoshop. You can click on either of these options to use these colors. If you need to select a color in a different color mode (CMYK, HSB) or a specific web color or a Pantone color select the Use Photoshop Picker option which will open the standard Photoshop color dialog. You can also select a color out of the Preview window by using the Eyedropper tool located to the right of the Color Picker. To preview colors interactively using the Eyedropper:
There are two options in the Color Picker labeled Transparent and None. These options are useful when working with multiple elements or a multiple layered file, like a layout, that contains transpareny. These options allow you to make the background, the area outside of an element either transparent or non-existent. While both of these options appear similar there are a couple of differences. Transparent: The transparent option is available with any element. The transprent option will make the area outside of an element trasparent. If the options palette is set to Apply to Current Layer this option will paint away the area outside fo the element on that layer. This is the method used to "rip" the edge of an image. If the Options Palette is set to one of the new layer options it will leave the area outside of the element transparent. This is useful if you are using the border or glow effects and do not want a background. The None option is only available for certain elements, usually those that contain color like the tape and tack adornments and most of the film edges. With the none option enabled the background area is rendered as transparent no matter the preference in the Options palette. |
 |
See also