Home > Using Genuine Fractals > Batch Processing > Primary Tab
Primary Tab
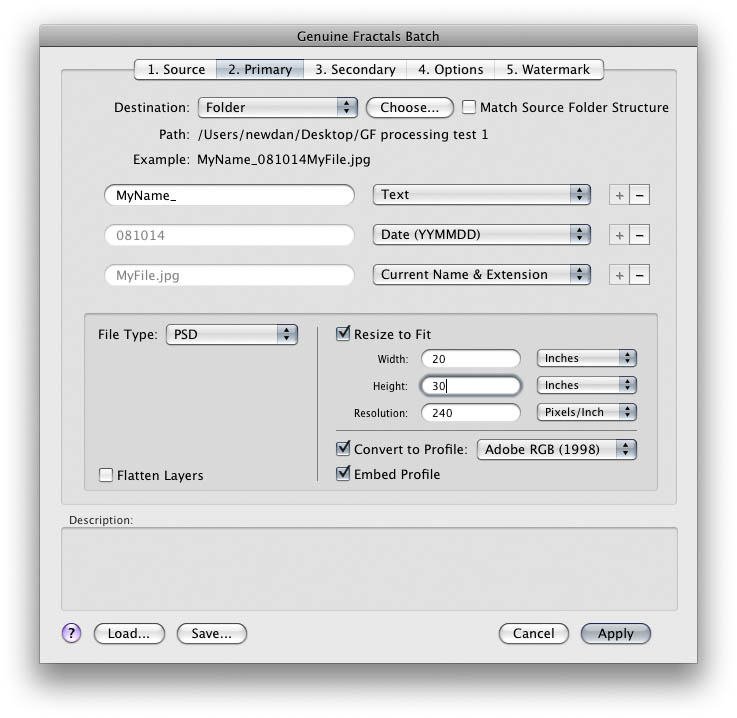
| The Primary tab contains the destination, file naming, size and type options for the first set of files to be processed. Destination: In the destination section you define where to put the files that are batch processed. It is similar to the source tab and has two options. The first is save and close. When this option is selected each file that is processed will be saved with the same name and file type as the original. If your source files are camera raw files they will be saved as PSD files. If you use the folder option you can create new child documents from your original files. You can control the names and file types in the File Names and File Types tabs. Use the Choose... button to select the folder where you would like the new files to live. Like the source tab there is also an option to create matching subfolders if the source folder has subfolders. For example iif your source folder has subfolders named ceremony, formals and reception the Genuine Fractals will create matching subfolders in the destination folder and place the new files in the matching folder structure as the originals. File Naming: The file naming section allows you to determine the name of new files created through batch processing. You are allowed to add up to three naming articles, or segments, consisting of the original file name, the date, serial number or custom text. |
 |
| Article | What is It? |
| Current Name | The original filename without the extension. Genuine Fractals will always add the proper extension to the end of the filename. Example: DSC007 |
| Current Name and Extension | The original filename and extension. Genuine Fractals will always add the proper extension to the end of the filename. Use this option if would like to add the original extension to the file name as well as the current extension. Example: DSC007.jpg |
| Text | A line of text of your choice up to 32 characters long. This could be a job or client name or anything you like. Example: whateverIwant |
| Serial Number | A numerical serial number. It may be up to eight digits long and supports leading zeros. You can specify any number to start with. Each file will be numbered sequentially starting with your first number. Example: 0001 |
| Date | Todays date in YYMMDD format. Example: 070926 |
Here are some examples of batch names you could create.
| Articles | Example |
| Text+Serial Number | myfile_001.jpg |
| Original Name+Text+Serial Number | DSC007_Johnson_001.jpg |
| Text+Date+Serial Number | myfile_070926_001.jpg |
| Original Name with Extension+Text | DSC007.CR2_Converted.jpg |
File Type:
|
See also