Home > Using Genuine Fractals > Gallery Wrap
Gallery Wrap
![]()
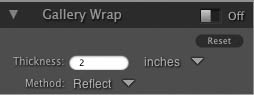
| The new Gallery Wrap feature is designed to help you print on canvas. When making enlargements for canvas it is common to wrap a portion of the image around the wooded stretcher bars, which can be several inches thick, that are used for mounting the canvas. These are commonly called gallery wraps. However if the photographer had important detail near the edges of the image they may be lost in the wrapping process. The new Gallery Wrap feature in Genuine Fractals 6 Professional Edition automatically creates extended margins by reflecting or stretching the areas near the edge of the image allowing the photographer to create a gallery wrap without having to sacrifice any of the original image. The Gallery Wrap feature allows you to select the thickness of the canvas mounting bars and offers a variety of techniques for creating additional margins. To use the Gallery Wrap feature follow these instructions:
The Gallery Wrap feature has several methods for adding margins:
|
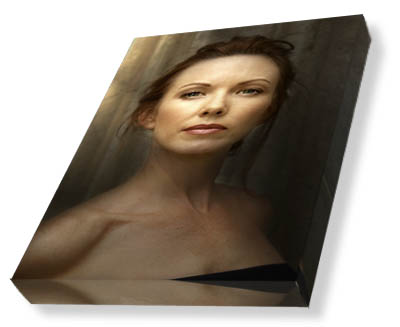  |
 Without the Gallery Wrap feature, important parts of the image get lost when wrapped. |
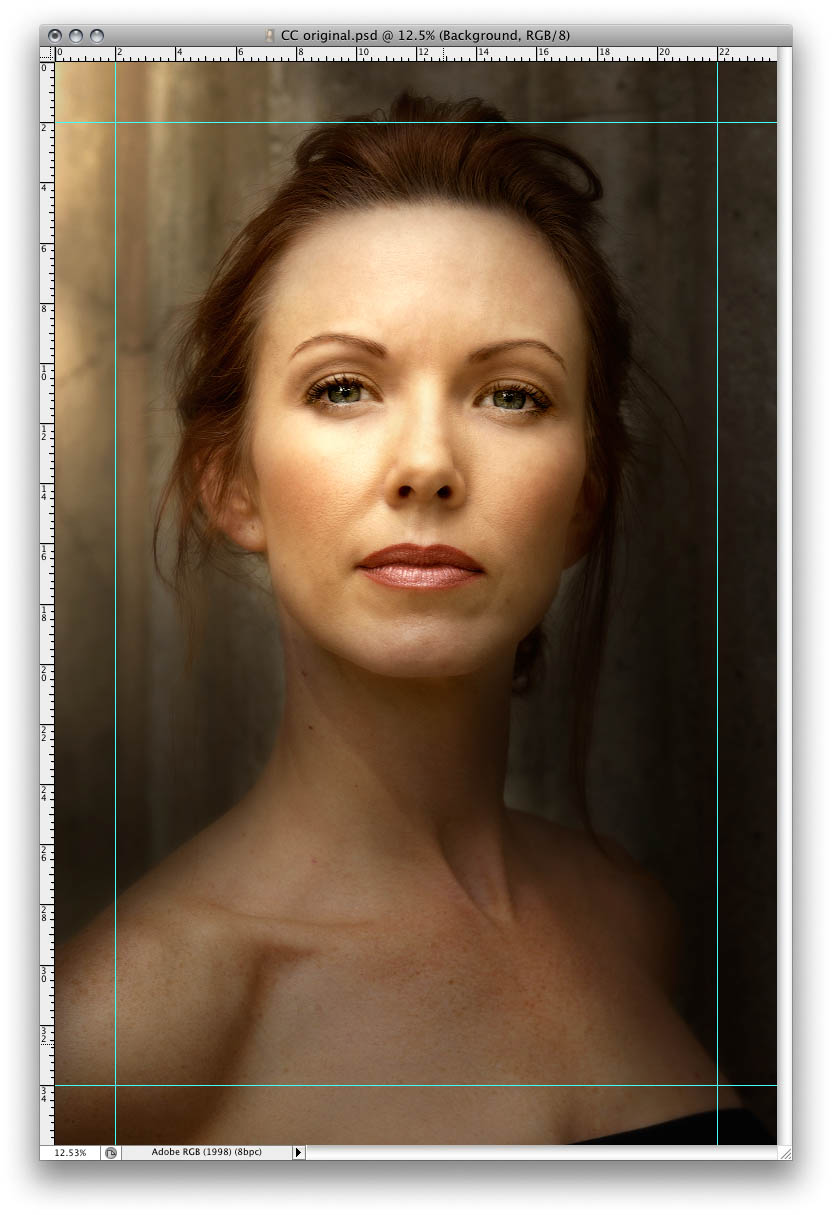
 With Gallery Wrap enabled, you can maintain the original image area but still have the extended margins needed to wrap canvas on thick stretcher bars. |
 |
Note: It is not recommended that you use the borderless printing option on a printer or use borderless lab prints when the overlap is set to zero. Both borderless methods increase the image size 1-3 percent to allow for overprinting and/or trimming. The resulting prints may not align properly. When using zero overlap be sure to print your images with white margins and then trim them by hand to ensure proper size and alignment of each tile. |
See also