Quick Start Guide
Home > Quick Start Guide
Step 1
Launch Photoshop, select an image and then double click on FocalPoint 2 in the onOne Panel. After a few moments you will see the FocalPoint 2 interface.
Note: 
Step 2
Start by positioning the FocusBug in the center of the
area that you want to keep in focus. Then adjust the size and shape of
the sweet spot by pulling and rotating the legs of the FocusBug. To do
this click and hold at the end of any leg. The end of the leg will turn
blue to let you know that you may click to control that leg.
It is
often useful to turn on the grid when making these adjustments. This
will allow you to see the exact size and shape of the sweet spot.
You can control the visibility of the grid by selecting View >
Focus Bug Grid and setting it to Auto, On, or Off. Auto will display
the grid only when the FocusBug is selected. You can also adjust the
opacity of the grid to make it easier to work with your image if needed.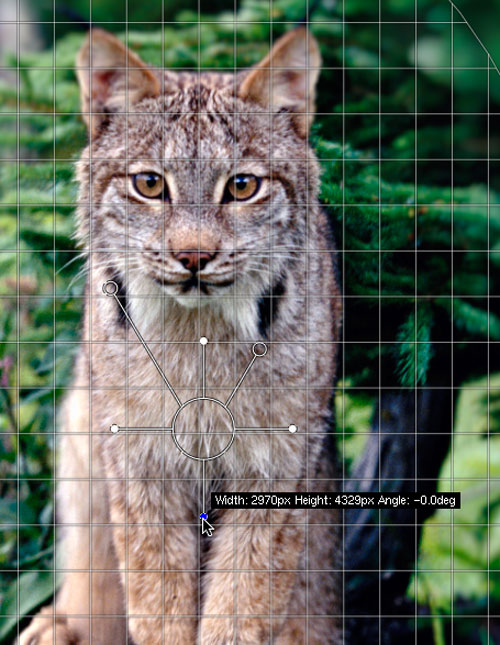
Step 3
Once you have defined the sweet spot with the FocusBug
it is time to adjust the feather as well as the amount and type of
blur. This is easily accomplished by using the antennae of the
FocusBug. Start with the upper right hand antenna and stretch it as far as it
will go. The length of the right antenna adjusts the amount of blur.
With the amount set to its maximum, wiggle the antenna up or down to
adjust the feather. The feather controls how soft the edge is between
the in-focus and out-of-focus regions. If you select a large feather it
may be necessary to readjust the size of the sweet spot. Once the
feather is set, adjust the length of the right antenna to the desired
amount of blur.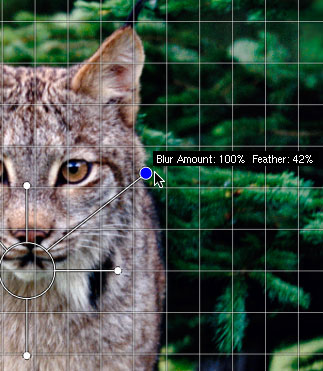
Step 4
Once you have adjusted the Blur and Feather with the right antenna you can adjust the Vignette using the upper left antenna.
Stretch the left antenna in or out to control the Midpoint, or the relative size of the Vignette. Moving the antenna up and down will control the Lightness of the Vignette. 
Step 5
For more fine tuned control over blur, use the FocusBrush to paint in or out areas of focus. Select Brush icon at the bottom of the interface and make adjustments to the FocusBrush in the FocusBrush panel on the right hand side. 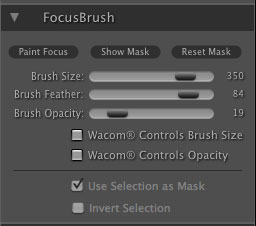
Step 6
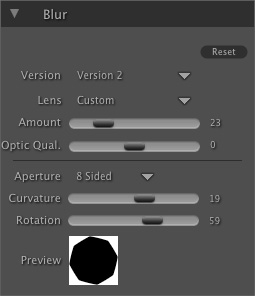
For more control over the type of Blur, Highlight Bloom, Brightness and Contrast as well as the Vignette, use the controls on the right hand side of the interface.
Lens presets that simulate the look of actual lenses are in the Blur Pane. 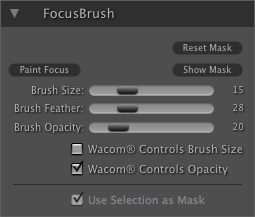
Step 7
When you have adjusted all of the above controls, press the Apply button in the bottom right corner to apply the effect and return the results to Photoshop or Aperture.

See also