Home > Using FocalPoint 2 > Photoshop Lightroom Use > Applying a Preset

Applying a Preset


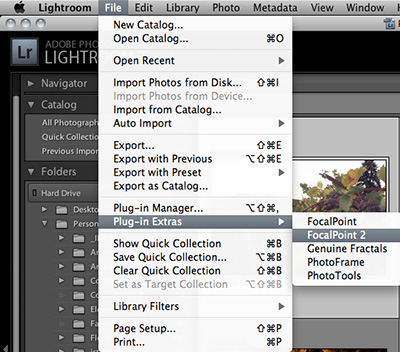
 To Apply a FocalPoint preset or favorite to an image or group of images in Photoshop Lightroom follow these instructions:
  1. Open Photoshop Lightroom
  2. Select an image(s)
  3. Go to File > Plug-in Extras
  4. Select FocalPoint 2
  5. The FocalPoint 2 for Lightroom dialog will appear, select a preset from the list and press Apply.


For Details on using the FocalPoint 2 for Lightroom dialog look below. 


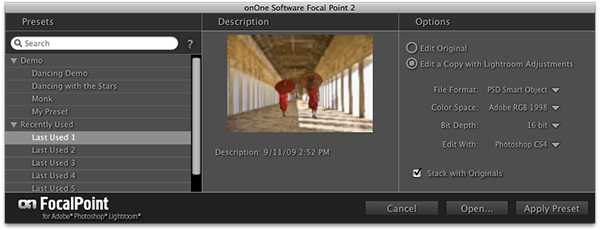
This the FocalPoint 2 for Lightroom dialog. It consists of these controls:
  • Search: Type in the name of a preset. The results will appear in the Search Results category. 
  • Category List: Lists your preset categories as well as a special category for your Recently Used. Click on the triangle to open each category.
  • Description: Displays a saved preview of preset as well as the description for the selected preset.
  • Options: The controls how your image is treated before it is sent to FocalPoint. You can select from editing the original, a copy with Lightroom Adjustments applied or a just a copy. If you select either of the copy options you may also select the file format, color space and bit depth. If you have multiple versions of Photoshop installed you may also select which version of Photoshop to use FocalPoint in. The last option, Stack with original will place the edited version of your image in the Lightroom catalog with the original.
  • Cancel: Cancels FocalPoint for Lightroom
  • Open...: Rather than applying a preset directly, this option will open your image in FocalPoint so you can manually adjust the options
  • Apply Preset: Applies the selected preset to your image(s)

   Note: If you have camera raw files in your selection you will not be able to use the Edit Original option.
Note: FocalPoint for Photoshop Lightroom is only available with a full version of Photoshop, not Photoshop Elements.


See also